Bathroom Tiling in an Older Irish House: What the Tutorials Don't Tell You
, by Meabh Whelan, Interior Trades
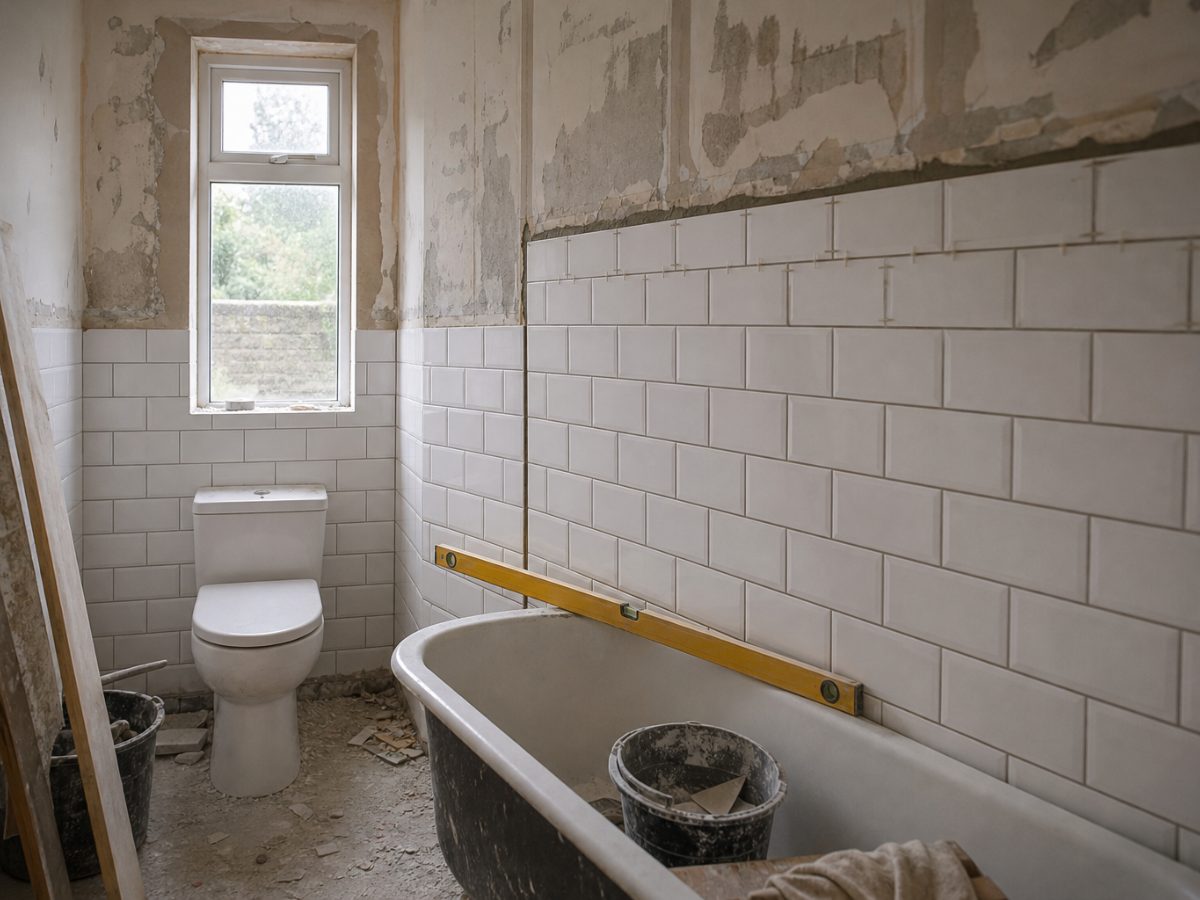
Most tiling tutorials start with a clean, flat, dry wall and a confident presenter who makes the whole job look like an afternoon's work. If you've got a pre-war terrace in Cork or a 1950s semi in Finglas, you'll know that isn't the reality you're dealing with. Older Irish houses have their own rules, and the walls are usually the first thing that'll surprise you.
The wall is the problem, not the tiles
Victorian and 1950s plaster in Irish houses tends to be lime-based or a mix of lime and gypsum, often applied in three coats over timber lath or older blockwork. It moves. It breathes. It bulges in places, sinks in others, and over the years it absorbs moisture and releases it again with the seasons. A bathroom makes all of that worse.
The first mistake most people make is assuming a wall that looks flat is flat. Run a long spirit level or a straight piece of timber across the surface. In an older house you'll nearly always find dips and high spots of ten or fifteen millimetres. That matters enormously for tiling, because adhesive can only do so much before the variation causes tiles to rock, crack, or hollow out behind.
Online guides will tell you to clean the surface and prime it. In a newer house with smooth plasterboard or sand-and-cement render, that's mostly enough. In an older house it's about a quarter of the actual prep work.
What you actually need to do before a tile goes near the wall
Start by sounding the plaster. Tap across the entire wall with your knuckles. Hollow sounds mean the plaster has pulled away from the lath or substrate underneath. Any hollow section needs to come off before you tile. Putting tiles over failing plaster is one of those jobs that looks fine for six months and then costs twice as much to fix properly later.
Once you've removed the loose or hollow sections, you have a decision to make. You can either have a plasterer make good the patches and bring the wall back to a consistent surface, or you can board over the whole wall with tile backer board. Tile backer board, sometimes called cement board or Hardiebacker, is waterproof, dimensionally stable, and gives you a reliable surface that doesn't care about the old plaster behind it. For a bathroom in an older house, it's often the more practical route. The cost is real but so is the peace of mind.
If you're going the plaster repair route, make sure you use the right material. Matching old lime plaster with modern gypsum-based products causes problems because they behave differently as they dry and move. If you need help finding someone who knows the difference, there's some useful guidance on how to find a reliable plasterer that's worth reading before you start ringing around.
Allow any new plaster work to dry fully. In an Irish autumn or winter that can take weeks, not days. Rushing this is a common source of tile failures.
Adhesive choices and why they matter more in old houses
Standard wall tile adhesive is fine in many situations. In an older house with slight ongoing movement, a flexible adhesive is a better choice. It costs a little more but it accommodates the small shifts that happen in old buildings as temperatures change. If the house has never been fully insulated or damp-proofed, those movements can be more pronounced than you'd expect.
Use the right notch trowel for the tile size you're using. Larger format tiles need a larger notch to get enough adhesive coverage. This sounds obvious but it's something people skip when they're buying tools on the cheap. Poor coverage behind the tile leaves voids where moisture can sit, and in a bathroom that's asking for trouble.
Damp: the thing hiding behind the wall
Older Irish houses, particularly pre-1970s builds, often have no cavity wall and limited or no damp-proof course. In a bathroom, a wall that's taking in moisture from the outside while also getting steam and splashing from inside can develop problems that no amount of tiling will fix on its own.
If you're seeing staining, efflorescence (those white salt deposits), or if the plaster feels soft or crumbles when you press it, you have a damp issue that needs to be dealt with before you tile. Tiling over active damp traps moisture and usually makes the problem worse.
This is the kind of thing that catches people out on bigger renovation projects too. Understanding what you're actually dealing with before work starts, and what the costs might escalate to, is something a lot of homeowners only learn the hard way. If your bathroom renovation is part of a larger project, it's worth thinking about whether hiring a quantity surveyor makes sense to get realistic numbers before anyone starts pulling walls apart.
Setting out and starting points
In a bathroom with an out-of-plumb wall and an out-of-level floor, deciding where to start your tile layout is not trivial. Most guides say to find the centre of the wall and work out. In a small Irish bathroom with a sloped ceiling or a quirky corner, that advice can give you awkward slivers of tile in the most visible spots.
Take the time to dry-lay a row of tiles along the floor and mark out where the cuts will fall before you mix any adhesive. Move the starting point if a cut is going to land at less than half a tile width in a prominent corner. It takes twenty minutes and saves hours of regret.
Old houses are worth the extra patience. The walls have seen enough rough treatment over the years without you adding to it.